

How To Move Photos From Iphone To Usb On Mac
How to Transfer Photos from iPhone to USB Even without Computer
How to transfer photos from iPhone to USB flash drive with or without computer? This guide will tell you three methods of how to put pictures on a flash drive. All methods are available for both Mac and Windows PC.
Read in: Read This Article in
iPhone Photos Tips
With its amazing built-in camera, people are very fond of taking photos with their iPhones. With time and use, photos become one of the biggest consumers of your limited iOS storage. So you may want to a USB flash drive, and then delete them from your iPhone to free up space.
However, Apple offers no direct way for iOS users to transfer photos from iPhone to flash drive. Worry not, we have workarounds for that. Here in the following guide, we will show you how to transfer iPhone or iPad photos to an external hard drive with or without a computer.
Transfer iPhone Photos to USB
- 1. Transfer Photos from iPhone/iPad to Flash Drive with AnyTrans
- 2. Transfer Photos from iPhone/iPad to Flash Drive on Mac
- 3. Move Pictures from iPhone/iPad to USB on Windows PC
- 4. Transfer Photos from iPhone/iPad to flash drive without a Computer
Transfer Photos from iPhone/iPad to Flash Drive in 1-Click
Compared to the other complicated methods, this method is much simpler and has no limitations. With AnyTrans, just 1 click is needed to move photos from iPhone or iPad to flash drive, to the computer, or to another iDevice. This app applies to both Mac and Windows. And below are its highlights on photos transferring.
AnyTrans – iOS Photo Transfer Tool
- Transfer piles of photos from the iPhone/iPad to USB Directly.
- Transfer all photos like Camera Roll, Live Photos, Screenshots, etc.
- No harm to the picture and will be kept in original quality.
- Other content including music, messages are also available.
Now, Free Download AnyTrans on your computer, and then follow the steps below to transfer photos from iPhone or iPad to flash drive on Mac and Windows.
Step 1. Connect your iPhone/iPad and flash drive.
Launch AnyTrans and connect your iPhone or iPad to computer with a USB cable > Connect your USB flash drive to your computer > Choose "Device Manager" > Click on the "Photos" tab.
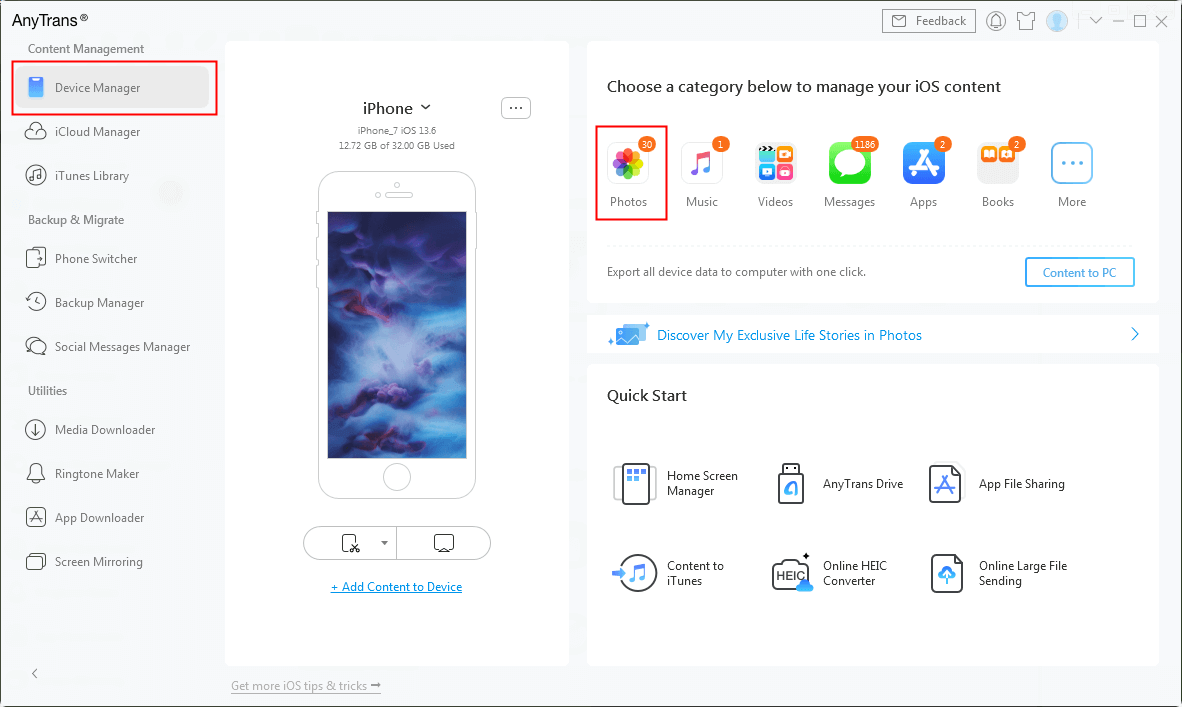
Choose Photos in Device Manager
Step 2. Choose the photos category to transfer.
Select the photos you want to transfer > Click on the "Send to Computer" button and it will ask you to change the export setting > Choose "OK" to change the export path.
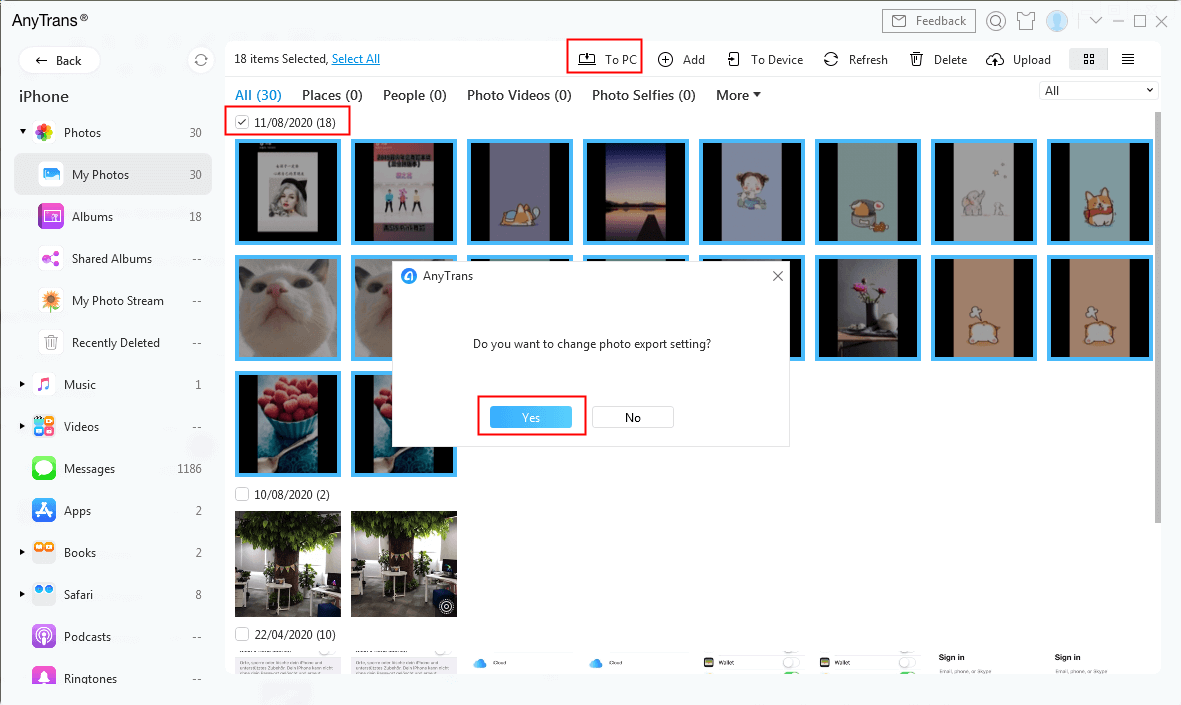
Choose Photos and Click To PC
Step 3. Transfer pictures from iPhone/iPad to USB flash drive.
Click on the "Select" button to choose your flash drive to be the export path > "Open" > Click on the "Save" button to start moving photos to your thumb drive.
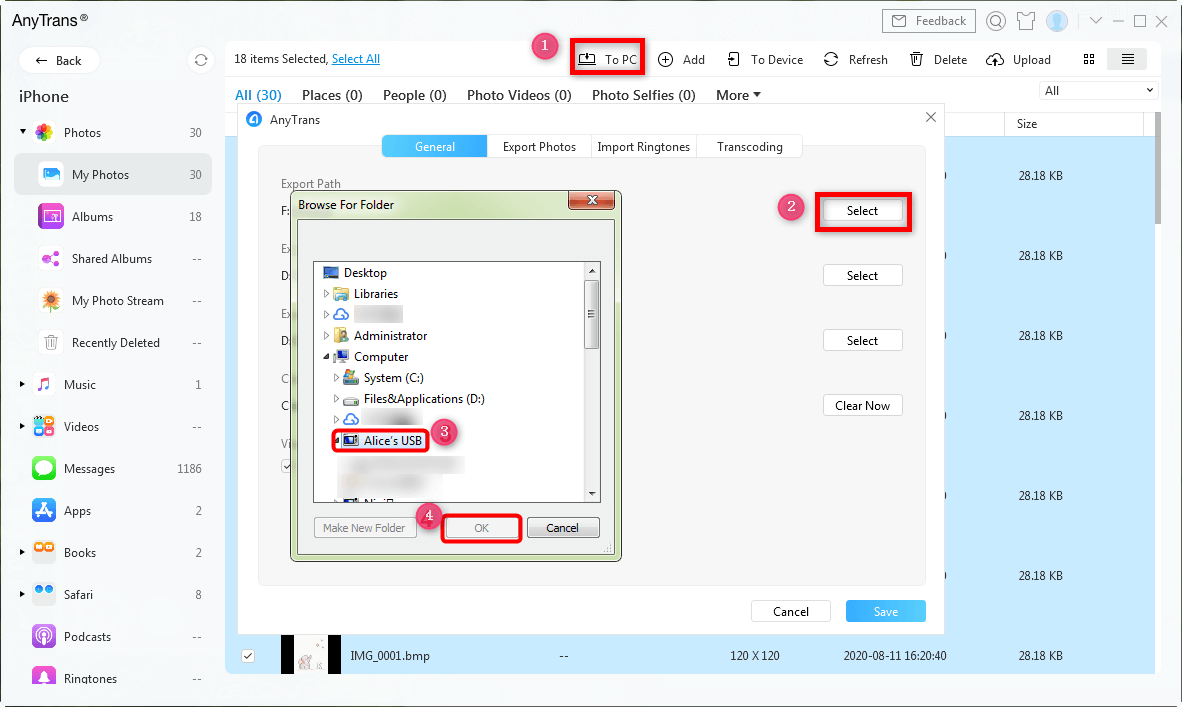
Transfer Photos to USB/Flash Drive
After the process completes, you can check the transferred photos on your computer.
Since iOS 11, Apple started using HEIC format for saving photos on iOS devices and Mac. However, it is not yet widely compatible. Recently, a lot of users reported that they can't upload HEIC photos from iPhone to their Windows, and so does some Mac users.
If you have this problem too, you can use a free iMobie HEIC Converter to change HEIC images into the commonly supported JPG format or JPEG, PNG, GIF. Besides, this online tool helps you keep files high-efficiency original, which means you can choose the image quality including High, Medium, and Standard with it.
Transfer Photos from iPhone/iPad to Flash Drive Wirelessly
When there is no USB cable aside, you can choose the AnyTrans app that supports transferring photos from iPhone/iPad to flash drive wirelessly. Before the detailed steps, connect your iPhone to stable Wi-Fi.
It can help you transfer files like music, video, documents from phone to computer and vice versa, or between two devices. You just need to install it on your devices(both iOS and Android are compatible), then you can directly transfer files from one device to another wirelessly via this app.
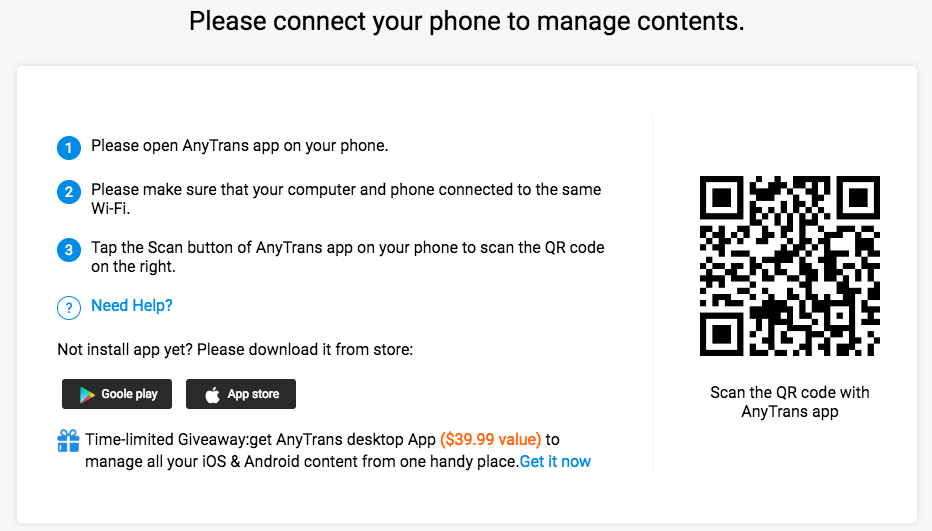
Step 1. Install the AnyTrans app on your iPhone.
Step 2. On your computer, enter
Step 3. On your iPhone, open the AnyTrans app you just installed and tap on the Scan button on the top right corner to scan the QR code on your computer.
How to Transfer Photos from iPhone to a USB Flash Drive Wirelessly
Step 4. Then all your iPhone photos will show up on the computer. Select the photos you want to save to flash drive and click the "Download" button to start transferring. Then you need to move the photos to your flash drive.

How to Transfer Photos from iPhone to a USB Flash Drive Wirelessly
Transfer Photos from iPhone/iPad to Flash Drive on Mac
For Mac users, the Photos app can be a good option for you to export photos from iPhone to flash drive on Mac. However, you have to aware that this app only supports transferring Camera Roll photos from iPhone to Mac. Other kinds of photos like iCloud sharing photos, iTunes synced photos, Live Photos can't be exported to your Mac.
If you want to transfer all the photos on your iPhone, Method 1 shows you how. And here are the detailed steps on how to transfer photos from iPhone to flash drive on Mac:
Step 1. Transfer photos from iPhone/iPad to Mac
- Connect your iPhone or iPad to Mac via a USB cable > Make sure that you have the latest version of iTunes on your Mac.
- On your Mac, the Photos app shall open automatically. If it doesn't, open the Photos app.
- Click the "Import" tab.
- Select photos you want to export, then click "Import Selected" or click "Import All New Photos" to transfer all your photos.
Step 2. Copy the imported iPhone/iPad photos to the flash drive
- To transfer iPhone iPad photos on Mac to flash drive, first plug in your flash drive to the Mac.
- In the Finder, find your external drive.
- Open another Finder window, find and open Pictures.
- Drag your library to the external drive.

Save iPhone Photos to USB via Photos App on Mac
Transfer Pictures from iPhone/iPad to USB on Windows
This method is mainly about how to transfer photos from iPhone/iPad to flash drive on Windows. Before you start, one thing we need to mention is that due to Apple's limitation, this way can only transfer Camera Roll photos on your iPhone. In addition, photos in other photo libraries can't be transferred to your flash drive by this method. If you want to transfer or save all your photos, photo transfer tools such as AnyTrans might help.
Step 1. Transfer photos from iPhone/iPad to Windows PC
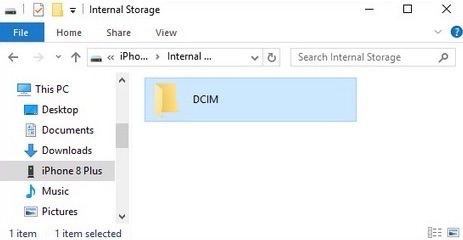
- Connect your iPhone/iPad to the Windows computer via a USB cable > Then Open it on your PC as a portable device.
- Choose "DCIM". Click the Internal Storage folder.
- Then choose the "DCIM" folder and find the photos you want to transfer.
Step 2. Copy the imported iPhone/iPad photos to your Flash Drive
- To transfer iPhone/iPad photos on PC to a flash drive, plug in your flash drive, and make sure it has enough room for all your photo files.
- Find the photos you want to transfer from the "DCIM" folder of your iPhone.
- Copy and paste or drag and drop them to the folder in your flash drive.
Move DCIM Folder from iPhone to USB Stick
How to Transfer Photos from iPhone to a USB Stick without Computer?
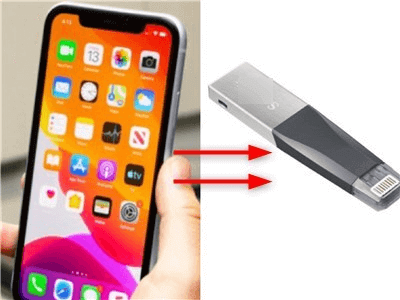
Can you transfer photos from iPhone/iPad to flash drive without a computer? Yes, you can. You need to buy a Flash Drive Stick for iPhone like Sandisk iXpand Mini(Price: from $27.00 to $40.93) orSandisk Wireless Stick(Price: $69.99). The difference between them is the former requires connecting your iPhone with the USB but the latter doesn't for it can transfer photos to your USB via WiFi.

Transfer iPhone Photos to USB without Computer
The Bottom Line
With the three methods above, you may have transferred pictures from iPhone or iPad to a flash drive successfully. And just as you can see, the first method can be the most direct and quick way to finish the task.
With the help of AnyTrans, you can always put your lovely pictures in the right place. If you have any questions about this post or AnyTrans, you can leave a comment or send an email to tell us. Take a tour with AnyTrans now >

Member of iMobie team as well as an Apple fan, love to help more users solve various types of iOS & Android related issues.
How To Move Photos From Iphone To Usb On Mac
Source: https://www.imobie.com/support/transfer-photos-from-iphone-ipad-to-flash-drive.htm
Posted by: zimmermanwidat1975.blogspot.com
0 Response to "How To Move Photos From Iphone To Usb On Mac"
Post a Comment